Practical Guide

Setting up the Graco ToughTek S340e (230V/10A) correctly
From the first flush to a stable spray pattern: recommended guide values, professional workflow, troubleshooting, and maintenance – compact for the construction site.
Introduction: What you will master in 10 minutes
- Guide values for connection, hose setup, and start procedure (no guesswork).
- How to cleanly adjust material and air volume for a consistent, round spray pattern.
- Typical problems (pack-out, low throughput, blink codes) – and what you can do immediately.
Note: Settings are material and temperature dependent. Values in this guide are guide values and are always fine-tuned on a test spray pattern.
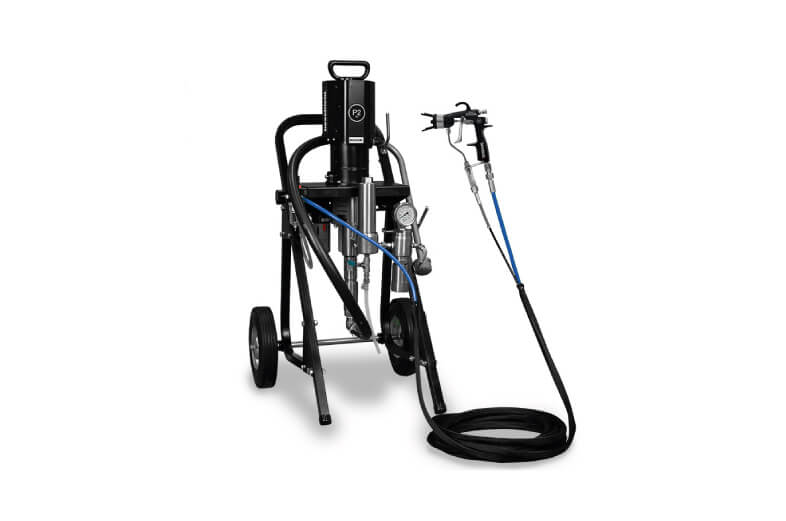
Figure: ToughTek S340e (230V/10A)
Product Overview: Variants, Use & Advantages (compact)
| Item | Guide Value / Info |
|---|---|
| System / Model | Graco ToughTek S340e, electric piston pump, 230V / 10A (Manufacturer No. 25A304) |
| Typical Materials | Water-based stucco/plaster bases, finish coats, and EIFS systems (Practice: always follow manufacturer data sheet) |
| Max. Working Pressure | 600 psi / 41.3 bar (Guide: run with "as little pressure as possible") |
| Max. Flow Rate | up to approx. 24.6 L/min (Material and setup dependent) |
| Viscosity Range | up to 10,000 cps (Guide value; pumpability must be tested in practice) |
| Hose Setup | min. 25 ft (~7.6 m), min. 1.0" hose diameter, hose pressure min. 600 psi |
| Temperature (Ambient/Material) | Ambient approx. 4–49°C, Material min. approx. 4°C (Guide values) |
| Why S340e scores in practice | Portable, high pressure, clear flushing/priming procedures, diagnostics via status LED (blink codes) |
KPI 1
41.3 bar
Max. working pressure – in everyday use, as low as possible.
KPI 2
~24.6 L/min
Max. Flow – depending on material, nozzle, hose.
KPI 3
10,000 cps
Max. Viscosity – always check pumpability in practice.
Pro Tip: Check pumpability lightning-fast (without a lab)
For stucco base/base coats, you can use the "plumb bob" thumb test: Place a standard plumb bob (approx. 8 oz / 4 in.) lightly on the material and let it drop. If it sinks approx. ¾ or more, the consistency is usually pumpable. If it's significantly less: Adjust the material according to manufacturer specifications (mix/adjust if necessary) and test again.
CTA: Buy S340e directly or secure advice
Tip: If you already know which material (Base/Finish/EIFS) and which hose lengths you use, you will receive the right recommendation faster.
Recommended Basic Settings (Guide values from manual)
| Area | Guide Value / Procedure |
|---|---|
| Power Supply | 230V, single-phase, dedicated circuit min. 10A. Only use grounded outlets. |
| Extension Cord | If necessary: 3-wire, intact ground; cross-section at least 12 AWG / 2.5 mm² (avoid voltage drop). |
| Hose | At least 25 ft (~7.6 m), pressure resistance at least 600 psi; build hose from large to small. |
| TSL (Wet Cup) | Keep TSL in packing nut/wet cup area ½ full (protection against adhesion/wear). |
| Start (Priming) | Flow knob fully counter-clockwise to stop, then motor ON. Slowly increase pressure/flow until water/material exits cleanly (never start with a dry system). |
| Atomizing Air | Air active at the applicator before and after material flow (keeps passages clear). Adjust air volume to "minimum for a good pattern." |
| Spray Distance | Pole applicator: approx. 45–76 cm. HTX: approx. 15–46 cm. Always adjust by testing on cardboard. |
Pro Workflow (5–7 steps) – for stable operation
- Setup & Safety: Ground the device, use a dedicated circuit, check hoses/fittings (seals, camlocks clean).
- Check TSL: Wet cup ½ full – prevents material buildup and packing wear.
- Prime with water: Close flow knob completely, then open slowly until water exits cleanly; run clean-out ball(s) through.
- Mix & Manage Material: Only mix as needed, keep pot life in mind, keep hopper walls clean.
- Prime with material: Remove applicator for priming, push out residual water into a waste container, then circulate material until a stable flow is achieved.
- Adjust spray pattern: First choose tip/nozzle appropriate for grain size, then fine-balance fluid flow and air (test on cardboard, 50% overlap).
- Flush before it becomes critical: If flow drops or material starts to harden: immediately start flushing procedure (water, flush valve, clean hose with clean-out ball).
Troubleshooting: 4 typical problems + immediate actions
1) Low throughput / Pump runs, but little material
- Check valves/balls: clean, check seats (outlet/inlet balls must seat cleanly).
- Check hose setup: too long/too small → reduce length or increase diameter.
- Applicator/tip clogged: clean or replace; check camlock seals.
2) Irregular spray pattern / "poor finish"
- Atomizing air too low: finely open air valve/needle on applicator until a round, even pattern is formed.
- Nozzle/tip worn or wrong size: adapt tip size to grain & desired structure.
- Material getting thicker: adjust consistency according to manufacturer instructions and test again.
3) Motor runs – nothing comes out / Pack-out (Material hardened)
- Relieve pressure: Close flow knob, motor OFF, remove tip/retainer, slowly open drain/purge valve.
- Flush hose/pump: Flush with water if possible; if material is hardened, disassemble and clean pump.
- Fix the cause: too much pressure/too small nozzle/too thick material → in future use "lowest pressure + largest fitting nozzle."
4) Status LED flashes (Electronic protection)
- Multiple voltage spikes or low voltage: check power supply/line, remove other consumers from the circuit.
- Overheating: let device cool down, ensure good ventilation, do not block air intake.
- Blockage/obstruction: relieve pressure, remove blockage, power off/on (Power Cycle).
Maintenance: 5 points that massively reduce pack-out & wear
- Flush daily: always before material starts to harden; flush system at least twice and drain water completely in between.
- Keep Hopper clean: clean walls with brush/pad, remove old material residue.
- Check hoses & camlocks: wear, seals, tight connections – before every use.
- Flush drain/purge valve: flush after every use of the valve (otherwise material hardens in the valve).
- Maintain TSL level: Wet cup ½ full; additionally inspect check-balls/wear-parts regularly (weekly depending on use).
Extra Note: Do not leave water/water-based fluids in the pump overnight (rust protection).
FAQ (practical)
What hose length is sensible?
As short as possible, but at least approx. 7.6 m (25 ft). Longer hose increases pressure loss and pack-out risk – better to increase diameter instead of length.
Why should I run "lowest pressure + largest fitting nozzle"?
This reduces pack-out, protects seals and wear-parts, and stabilizes material flow – the spray pattern is fine-tuned via tip/nozzle and air.
Must the air at the applicator be on constantly?
In practice: air on before and after material flow – this keeps air passages clear and the spray pattern more consistent. For priming, air can remain open depending on the applicator.
What do I do if the material starts to "set" in the system?
Do not try to "force it through": flush early, flush the valve, clean hose with clean-out ball. The closer to the pot life, the more consistently you must clean.
Which power supply is recommended on construction sites?
Dedicated 230V circuit with at least 10A; only use 3-wire extension cord with sufficient cross-section (avoid voltage drop), always ground the device.
Conclusion
If you prime the S340e cleanly with water, mix material consistently, work with minimal pressure and a suitable nozzle, and flush in time, you will get a stable spray pattern without pack-out stress. For a suitable setup (material + hose + applicator), you can find the 230V/10A system directly at beschicht.com.